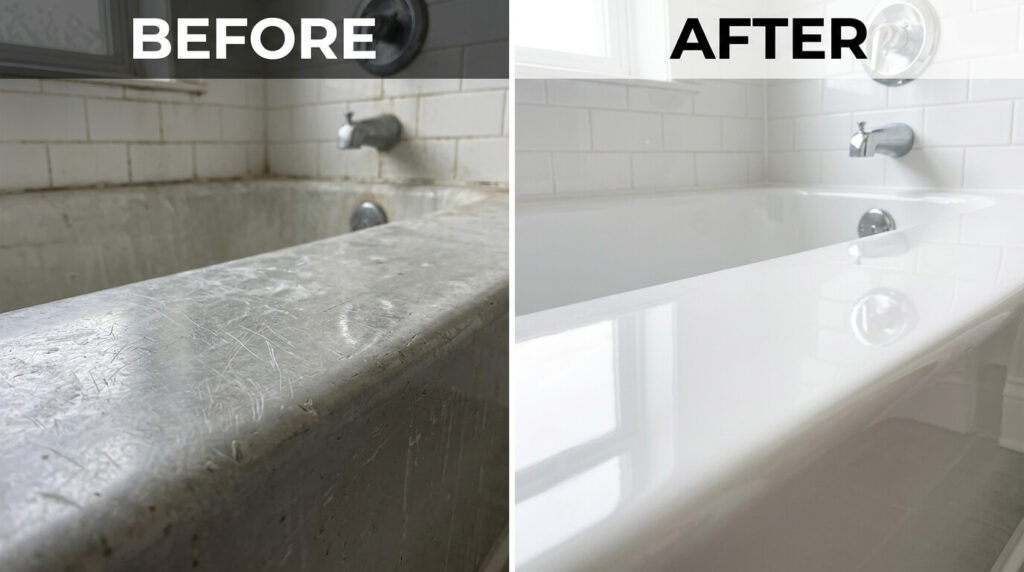
Learn how to clean an acrylic tub safely without scratching or dulling the finish. This step-by-step guide covers the best DIY and commercial cleaners, stain removal methods, what to avoid, and expert tips for keeping your bathtub spotless. Acrylic tubs look gorgeous — until soap scum, hard water stains, and grime start to build up. The good news? Cleaning an acrylic bathtub is straightforward, affordable, and something you can do in under 30 minutes using products you probably already have at home.
The catch: acrylic is a softer material than porcelain or cast iron. Use the wrong cleaner or scrubber, and you’ll end up with permanent scratches, a dull finish, or worse — a voided manufacturer warranty. This guide covers exactly what to do, what to use, and what to avoid so your tub stays sparkling for years.
What Makes Acrylic Tubs Different — and Why Cleaning Matters
Acrylic (technically polymethyl methacrylate, or PMMA) is a lightweight plastic material with a smooth, glossy, non-porous surface. That non-porous finish is one of its best features — it resists holding onto grime the way rougher materials do. But it’s also softer than porcelain or enamel, making it far more sensitive to abrasives and harsh chemicals.
Acrylic vs. Porcelain vs. Fiberglass: Key Differences
| Feature | Acrylic | Porcelain/Enamel | Fiberglass |
|---|---|---|---|
| Surface hardness | Soft | Hard | Soft |
| Scratch resistance | Low | High | Low |
| Stain resistance | High | Medium | Medium |
| Bleach safe? | No | Limited | No |
| Abrasives safe? | No | Sometimes | No |
| Typical lifespan | 10–15 years | 25+ years | 10–15 years |
Why Using the Wrong Cleaner Can Void Your Warranty
Most acrylic tub manufacturers — including major brands — explicitly state in their care guidelines that using bleach, ammonia, acetone, abrasive pads, or scouring powders can damage the surface and void your warranty. When in doubt, always check the care documentation that came with your tub.
What You’ll Need Before You Start
Before you start cleaning, gather the right supplies. The right tools make a huge difference between a safe clean and accidental damage.
Safe Cleaning Tools
- Microfiber cloths (your number one choice)
- Soft sponges (non-scratch variety)
- Soft-bristle brush (for textured areas and corners)
- Spray bottle
- Squeegee (for post-bath maintenance)
Avoid: Steel wool, scouring pads, stiff-bristle brushes, rough scrub sponges.
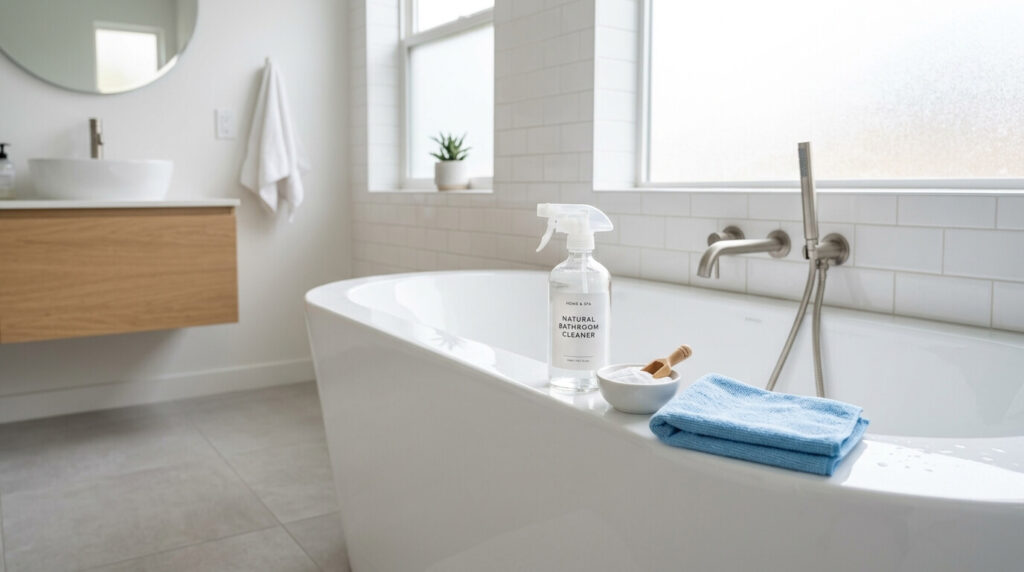
Safe Cleaning Solutions (DIY and Commercial)
DIY Options:
| Solution | Best For | How to Use |
|---|---|---|
| Baking soda paste | General grime, mild stains | Sprinkle on surface, add water, scrub gently |
| White vinegar (50/50 with water) | Mineral deposits, soap scum | Spray on, wait 5–10 min, wipe clean |
| Dawn dish soap + warm water | Light daily cleaning | Apply with sponge, rinse |
| Baking soda + hydrogen peroxide paste | Tough stains | Apply paste, wait 60 min, rinse |
Commercial Options: Look for cleaners specifically labeled “safe for acrylic,” “fiberglass-safe,” or “non-abrasive.” Products like Method Daily Shower Cleaner work well for regular maintenance.
Expert Tip: Always read the product label before applying anything to your tub. If it doesn’t say “safe for acrylic,” don’t use it.
How to Clean an Acrylic Tub — Step-by-Step
Quick Daily Cleaning (Under 5 Minutes)
A brief rinse after every bath or shower goes a long way in preventing buildup.
- Rinse the tub with warm water after each use.
- Spray a light mist of diluted dish soap solution (a few drops of Dawn in a spray bottle of water).
- Wipe with a microfiber cloth.
- Rinse again.
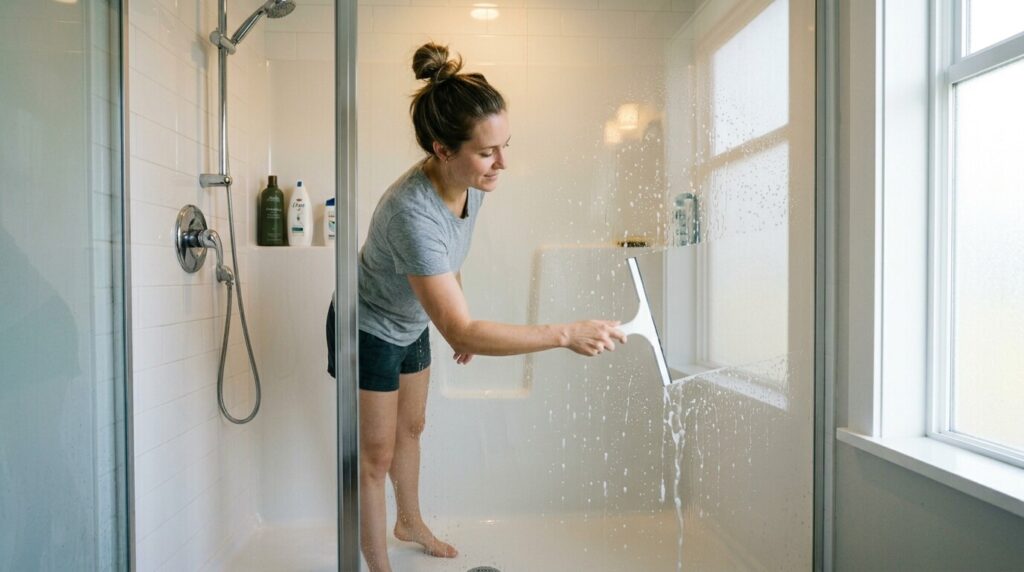
- Use a squeegee to remove excess water — this prevents water spots and mineral deposits.
This takes less than two minutes and dramatically reduces how often you need a deep clean.
Weekly Deep Cleaning (Step-by-Step)
For a thorough clean, follow this method once a week:
Step 1 — Clear the Tub Remove all bath products, shampoo bottles, soap dishes, and accessories from the tub. Set them aside on the counter.
Step 2 — Rinse with Warm Water Fill the tub with a few inches of warm water to loosen surface grime. Avoid extremely hot water — thermal shock can stress acrylic over time.
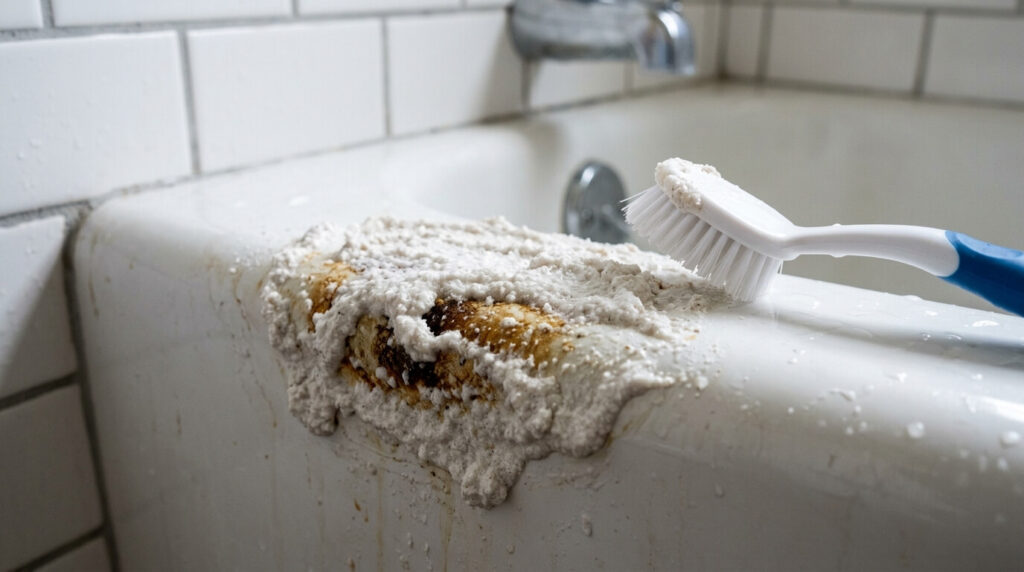
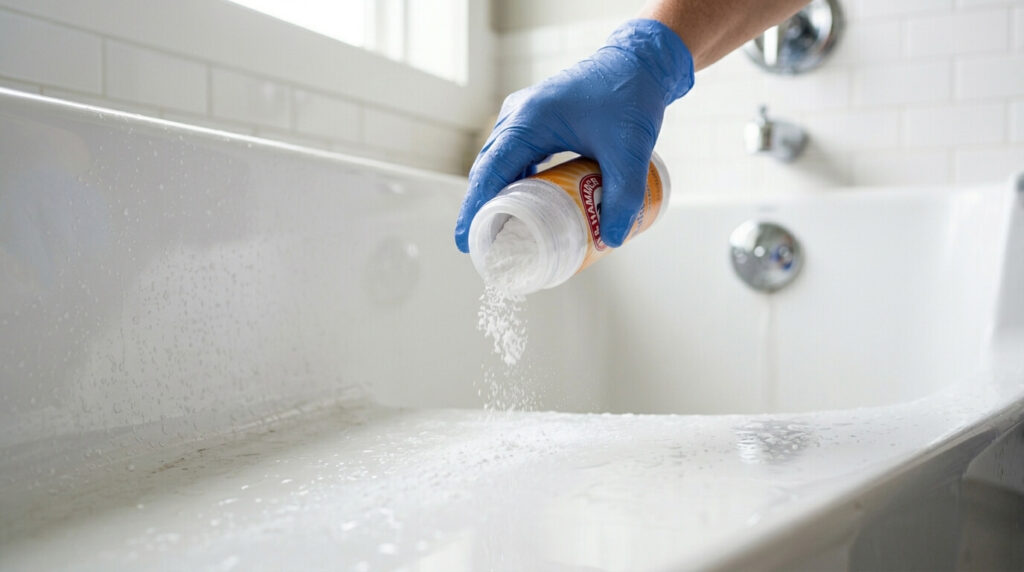
Step 3 — Apply Baking Soda Sprinkle baking soda generously across the entire tub surface, giving extra attention to corners, ledges, and the waterline where buildup tends to accumulate.
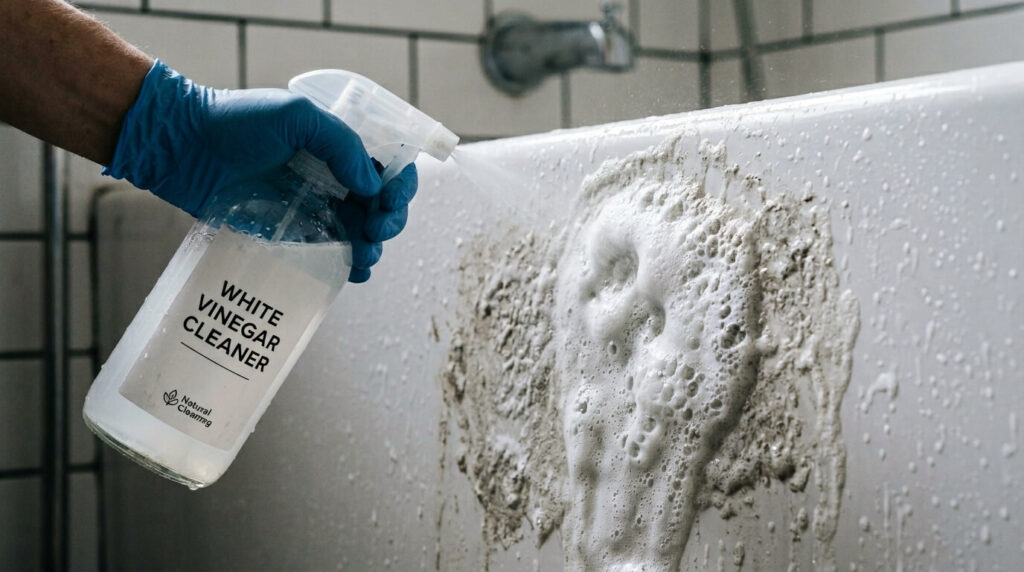
Step 4 — Add Vinegar Spray Lightly spray white vinegar over the baking soda. You’ll see a gentle fizzing reaction — that’s the combination working to break down soap scum and mineral deposits.
Step 5 — Wait 10–15 Minutes Let the mixture sit. This dwell time does most of the work for you.
Step 6 — Scrub Gently Using a damp soft sponge or microfiber cloth, work the paste across the surface with light, circular motions. For textured areas or corners, use a soft-bristle brush. Don’t apply heavy pressure — the baking soda does the lifting.
Step 7 — Rinse Thoroughly Drain the tub and rinse every surface completely with warm water. Leftover residue can dull the finish.
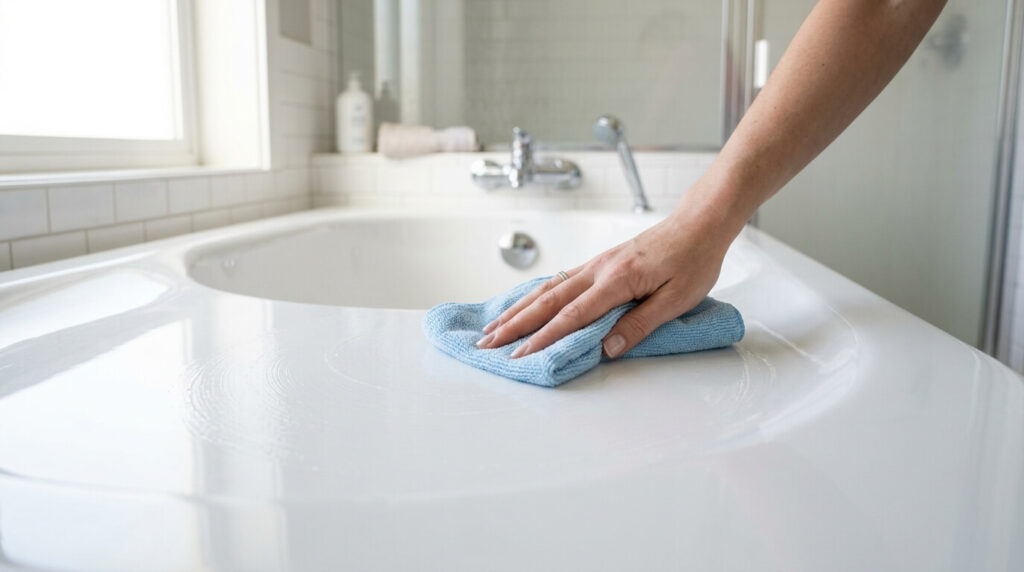
Step 8 — Dry the Surface Wipe the tub dry with a clean microfiber cloth. This prevents water spots and keeps the gloss looking sharp.
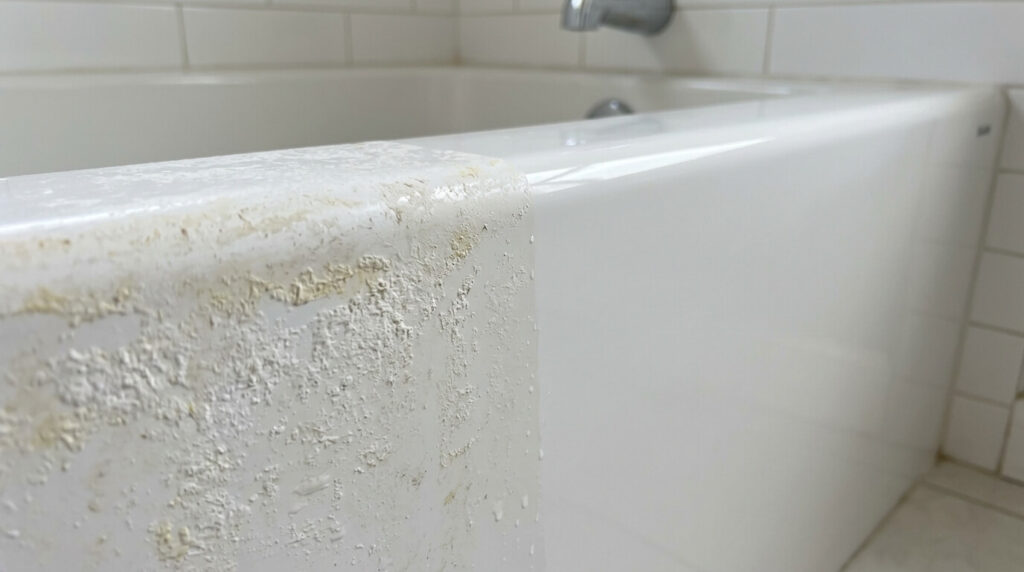
How to Remove Specific Stains from an Acrylic Tub
Different stains call for different approaches. Here’s a targeted guide for the most common problem areas.
Soap Scum
What it is: A filmy buildup from the reaction between soap and hard water minerals.
How to remove it:
- Mix equal parts white vinegar and warm water in a spray bottle.
- Spray generously over affected areas.
- Wait 5–10 minutes.
- Wipe clean with a soft cloth or sponge.
- Rinse thoroughly.
For heavier buildup, apply undiluted dish soap directly to the sponge and work in gentle circles before rinsing.
Hard Water and Mineral Deposits
What it is: White or chalky residue left by calcium and magnesium in tap water.
How to remove it:
Option A (mild deposits):
- Spray a 50/50 white vinegar and water solution on affected areas.
- Leave for 5–10 minutes (no longer — limit acid contact time on acrylic).
- Wipe clean and rinse thoroughly.
Option B (heavier deposits — tub soak method):
- Plug the drain and fill the tub with warm water.
- Add 2 cups of distilled white vinegar.
- Let soak for 15–20 minutes.
- Drain and gently scrub with a soft sponge.
- Rinse completely.
Prevention tip: A daily squeegee after bathing is one of the most effective ways to prevent mineral deposits from forming in the first place.
Mold and Mildew
What it is: Black, green, or pink discoloration, often appearing in corners and around the drain.
How to remove it:
- Make a paste of two parts baking soda and one part hydrogen peroxide (3% solution).
- Apply the paste directly to affected areas.
- Let it sit for 30–60 minutes.
- Scrub gently with a soft brush.
- Rinse thoroughly.
For ongoing prevention, ensure your bathroom is well-ventilated. Run the exhaust fan during and after baths to reduce moisture that feeds mold growth.
Rust Stains
What it is: Orange or brown staining caused by metal contact (razor blades, aerosol cans, or corroded hardware).
How to remove it:
- Apply a small amount of cream of tartar mixed with lemon juice to the stain.
- Let sit for 10–15 minutes.
- Gently scrub with a soft sponge.
- Rinse well.
Alternatively, a commercial rust remover labeled safe for acrylic surfaces can be used — check the label carefully.
Prevention tip: Never leave metal cans, razors, or shaving cream containers sitting directly on the acrylic surface.
Hair Dye Stains
What it is: Stubborn pigment stains from at-home hair coloring.
How to remove it:
- Apply 3% hydrogen peroxide directly to the stain using a cloth.
- Leave for 10–15 minutes.
- Wipe clean and rinse.
- Repeat if needed.
Act quickly — the longer hair dye sits, the harder it is to remove.
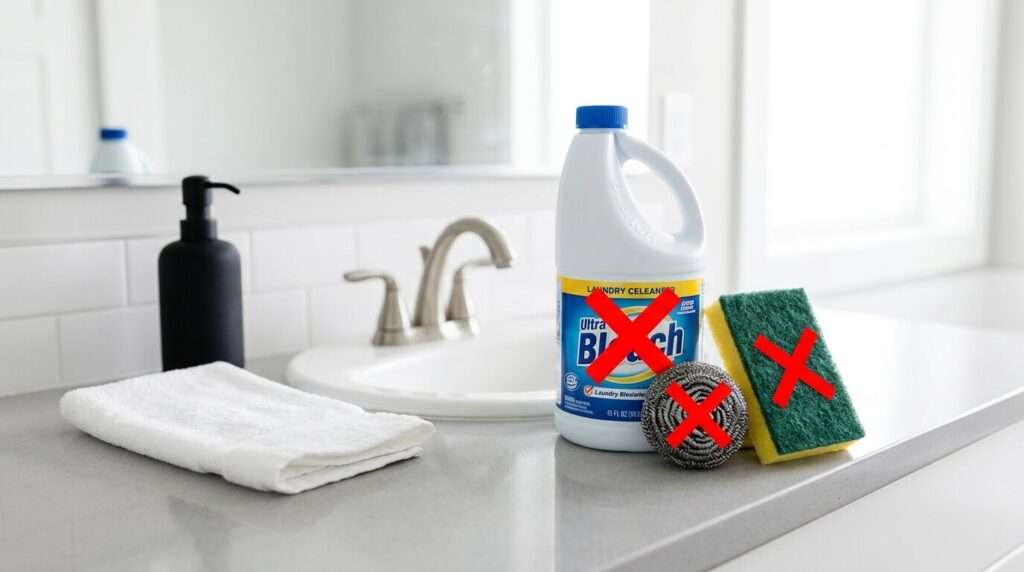
What NOT to Use on an Acrylic Tub
This is just as important as knowing what to use. The wrong product can permanently damage an acrylic surface.
Chemicals to Avoid
- Bleach (chlorine): Breaks down the acrylic over time, causing discoloration and surface deterioration. Most manufacturers explicitly prohibit it.
- Ammonia-based cleaners: Too harsh for the acrylic finish; strips the protective gloss.
- Acetone: A solvent that can cause “crazing” — fine spider-web cracks beneath the surface.
- Drain cleaners (chemical): Contain lye or sulfuric acid, which cause immediate and often irreparable damage.
- Strong solvents: Paint thinner, nail polish remover, and similar products dissolve the surface.
- Boiling water: Thermal shock from extreme heat can warp or crack acrylic.
Tools to Avoid
- Steel wool
- Abrasive scouring pads
- Stiff-bristle scrub brushes
- Powdered cleansers (like some popular kitchen scrubs)
- Magic Eraser (use with extreme caution only — it is a fine abrasive and can dull a gloss finish over time)
Can You Use Bleach on an Acrylic Tub?
This is one of the most searched questions about acrylic tub care — and the answer is clear: no, you should not use chlorine bleach on an acrylic tub.
What Happens When You Use Bleach
Bleach (sodium hypochlorite) is one of the harshest chemicals you can apply to an acrylic surface. With repeated use, it breaks down the plastic polymer, causing:
- Surface discoloration (yellowing or fading)
- Loss of gloss and shine
- Increased porosity, making the surface harder to clean over time
- Potential surface cracking or “crazing”
- Voided manufacturer warranty
Even a single application can begin the process of degradation, particularly on colored acrylic tubs. Bleach fumes in an enclosed bathroom also pose health risks, and mixing bleach with any ammonia-containing product creates toxic chloramine gas.
Safer Disinfecting Alternatives
If disinfection is your goal, these options are effective and acrylic-safe:
- 3% hydrogen peroxide: A solid disinfectant that breaks down into water and oxygen — safe for acrylic when rinsed promptly.
- White vinegar (diluted): Has mild antimicrobial properties, effective against many common bathroom bacteria and mold.
- Acrylic-safe commercial disinfectants: Look for formulas specifically labeled safe for acrylic, plastic, or fiberglass surfaces.
- Oxygen bleach (powdered): Unlike chlorine bleach, oxygen bleach (peroxide-based) is considerably gentler on acrylic. Still use sparingly and rinse thoroughly.
How to Fix Minor Scratches on an Acrylic Tub
Minor surface scratches can often be buffed out at home.
For very light scratches:
- Apply a small amount of non-gel white toothpaste to the scratch.
- Buff gently in circular motions with a soft cloth.
- Rinse and check the result.
Deeper scratches:
- Use a plastic polish or acrylic-safe surface restorer (available at hardware stores).
- Apply to a soft cloth and work in circular motions.
- Buff to a finish and rinse.
For significant damage: Contact a bath remodeling professional or the tub manufacturer. Attempted DIY repairs on deep scratches or chips can worsen the damage.
Tips for Keeping Your Acrylic Tub Looking New
Rinse the tub after every use to remove soap and product residue
Squeegee the surface after each bath to prevent water spots
Clean weekly — don’t let buildup go for weeks at a time
Dry the tub after cleaning to prevent water marks
Avoid leaving metal objects (cans, razors) on the acrylic surface
Ventilate your bathroom well to prevent mold growth
Check all cleaners for “acrylic-safe” labeling before use
Read and keep your tub’s care documentation
When to Call a Professional
DIY cleaning works for the vast majority of acrylic tub maintenance. But there are situations where professional help is the smarter choice:
- Deep scratches or chips that DIY repair hasn’t resolved
- Widespread yellowing or discoloration from chemical damage
- Surface crazing (fine internal cracking)
- Mold that persists despite repeated treatment (may indicate a deeper moisture issue)
- Cracks that reach the tub substrate
A bath remodeling professional can refinish, resurface, or advise on replacement options depending on the severity.
FAQ How to Clean an Acrylic Tub
Q1: How often should I clean my acrylic tub?
A: Rinse briefly after every use, do a light clean 2–3 times per week, and a thorough deep clean once a week. Regular maintenance prevents heavy buildup and keeps cleaning quick and easy.
Q2: What is the best cleaner for an acrylic tub?
A: The best cleaner depends on the job. For daily cleaning, diluted dish soap or a commercial cleaner labeled acrylic-safe works well. For stains and soap scum, a baking soda and white vinegar combination is highly effective and safe.
Q3: Can you use bleach on an acrylic tub?
A: No. Bleach (chlorine) breaks down the acrylic surface over time, causing discoloration, dulling, and potential cracking. It also typically voids the manufacturer warranty. Use hydrogen peroxide or an acrylic-safe disinfectant instead.
Q4: Can I use a Magic Eraser on my acrylic tub?
A: Use with extreme caution. Magic Erasers are micro-abrasive and can dull the glossy finish of an acrylic tub, especially with repeated use. Spot-treat only, use very light pressure, and avoid regular use.
Q5: How do I remove hard water stains from an acrylic tub?
A: A 50/50 solution of white vinegar and water is effective for most hard water stains. Spray, wait 5–10 minutes, wipe clean, and rinse thoroughly. For heavy mineral buildup, try a warm water and vinegar soak (2 cups vinegar in a tub of warm water) for 15–20 minutes.
Q6: How do I get rid of soap scum on an acrylic tub?
A: Mix equal parts white vinegar and warm water, spray onto the affected area, wait 5–10 minutes, and wipe clean with a soft cloth. For heavy buildup, a paste of baking soda and dish soap left for a few minutes helps lift stubborn residue.
Q7: Is baking soda safe for acrylic tubs?
A: Yes. Baking soda is a safe, mild abrasive that is gentle enough for acrylic when used with a soft sponge or cloth. It’s one of the best natural cleaning options for this surface.
Q8: Can I use vinegar on an acrylic tub?
A: Yes, diluted white vinegar is safe for acrylic. However, keep contact time under 10 minutes and always rinse the surface thoroughly afterward to prevent any etching from prolonged acid exposure.
Q9: How do I remove mold from an acrylic bathtub?
A: Apply a paste of two parts baking soda and one part hydrogen peroxide to the affected areas. Leave for 30–60 minutes, scrub gently with a soft brush, and rinse. Improve bathroom ventilation to prevent recurrence.
Q10: What causes yellow stains in an acrylic tub?
A: Yellowing can result from hard water mineral deposits, soap scum buildup, body oils, or — most seriously — chemical damage from bleach or harsh cleaners. For cosmetic yellowing, a baking soda and hydrogen peroxide paste often helps. Chemical damage may require professional refinishing.
Q11: Can I use dish soap to clean an acrylic tub?
A: Absolutely. A mild dish soap like Dawn mixed with warm water is one of the safest and most effective everyday cleaners for an acrylic tub. It’s gentle, non-abrasive, and cuts through grease and body oils effectively.
Q12: How do I fix scratches on an acrylic bathtub?
A: For minor scratches, buffing with non-gel white toothpaste in circular motions often helps. For deeper scratches, a plastic polish or acrylic surface restorer is more effective. Significant damage may require professional refinishing.
Q13: Is hydrogen peroxide safe for acrylic tubs?
A: Yes, 3% hydrogen peroxide (the standard drugstore concentration) is safe and effective for treating stains and disinfecting acrylic. Always rinse the surface promptly after use.
Q14: Can I use a steam cleaner on an acrylic tub?
A: Most manufacturers advise against steam cleaning acrylic tubs. High heat can stress or warp the material. Stick to warm water and the gentle cleaning methods outlined above.
Q15: What’s the best way to prevent soap scum on an acrylic tub?
A: Rinse the tub after each use and squeegee the surface dry. Switching to liquid body wash instead of bar soap can also significantly reduce soap scum buildup, as bar soap reacts with hard water minerals to form that characteristic film.