
Discover the best paint for bathroom walls, ceilings & trim. Compare finishes, top brands, color ideas, and step-by-step prep tips from experts. Choosing the right paint for your bathroom is one of the most impactful—and most commonly misunderstood—home improvement decisions you can make. Unlike other rooms, bathrooms face a relentless combination of steam, humidity, splashing water, and frequent scrubbing. Pick the wrong paint and you’ll be dealing with peeling walls, stubborn mold, and premature fading within months.
This guide covers everything: the best paint types and finishes for bathroom walls, ceilings, and trim; leading brands worth your money; color psychology and trending palettes; a step-by-step prep and painting process; and expert tips that even experienced DIYers often overlook. Whether you’re refreshing a powder room or overhauling a master bath, you’ll find the definitive answers here.
What Makes Bathroom Paint Different from Regular Interior Paint?
Before diving into product recommendations, it’s critical to understand why bathrooms demand specialized paint—or at minimum, a specialized finish.
The Unique Challenges of a Bathroom Environment
Bathrooms are high-moisture, high-traffic spaces. A single hot shower can raise interior humidity to 80–100%, and that moisture has to go somewhere. Without proper paint, it soaks into your walls, creating the ideal breeding ground for mold and mildew. Regular interior paint—even premium formulas designed for bedrooms or living rooms—simply isn’t engineered to withstand this.
Key bathroom-specific stressors include:
- Persistent humidity: Steam from showers and baths saturates the air and condenses on cool wall surfaces.
- Direct water splashes: Especially around sinks, tubs, and shower surrounds.
- Frequent chemical cleaning: Bathroom-grade cleaners and disinfectants are harsher than all-purpose sprays.
- Temperature fluctuations: Hot showers followed by cold air stress the paint film, leading to cracking and peeling over time.
- Soap scum and staining: Residue from soaps, shampoos, and grooming products can stain porous paint surfaces.
What “Bathroom Paint” Actually Means
The term “bathroom paint” typically refers to interior paint formulated with one or more of the following:
- Mold and mildew inhibitors (fungicides added to the paint chemistry)
- Enhanced moisture resistance (tighter film formation to resist water penetration)
- Higher sheen levels (for washability and durability)
- Scrubbability (ability to withstand repeated cleaning without losing sheen or color)
Some premium brands market dedicated “bathroom” or “kitchen & bath” product lines. Others achieve the same result through their standard interior formula in a semi-gloss or satin sheen. Understanding what actually matters—versus what’s marketing language—is the first step to making a smart choice.
Paint Finish for Bathroom Walls: A Complete Guide
The finish (also called sheen) is arguably more important than the paint brand when it comes to bathroom performance. Here’s a thorough breakdown of every finish option:
What Is Paint Finish?
Paint finish refers to the level of light reflectance in the dried paint film. It runs on a spectrum from completely flat (0% sheen) to highly glossy (high reflectance). The higher the sheen, the more durable and washable the surface—but also the more visible any wall imperfections become.
Flat / Matte Finish
Sheen level: 0–5%
Flat paint absorbs light, hides wall imperfections beautifully, and creates a soft, velvety look. It’s the go-to for living rooms and bedrooms.
In bathrooms: Flat and matte finishes absorb moisture rather than repelling it. They’re difficult to clean—scrubbing can remove the paint itself—and they’re prone to mildew growth and staining. Most professional painters and coating manufacturers explicitly warn against flat paint in bathrooms.
The exception: Some premium modern flat paints (such as Glidden’s premium flat formula) are now more washable than older generations. In a very well-ventilated powder room with minimal steam, a premium flat may hold up. But for most bathrooms, this is a gamble not worth taking.
Verdict: Avoid flat/matte in standard bathrooms. Only consider it in powder rooms with excellent ventilation and if you’re committed to premium-grade paint.
Eggshell Finish
Sheen level: 10–25%
Eggshell has a very subtle sheen—similar to the surface of an actual eggshell. It’s more washable than flat, hides minor imperfections, and offers a softer look than satin.
In bathrooms: Eggshell performs adequately in low-moisture bathrooms—think guest baths or half-baths (powder rooms) that see infrequent use and don’t generate much steam. It will struggle in a main bathroom used daily by multiple people.
Verdict: Acceptable for powder rooms and guest bathrooms; not recommended for family baths or bathrooms without good ventilation.
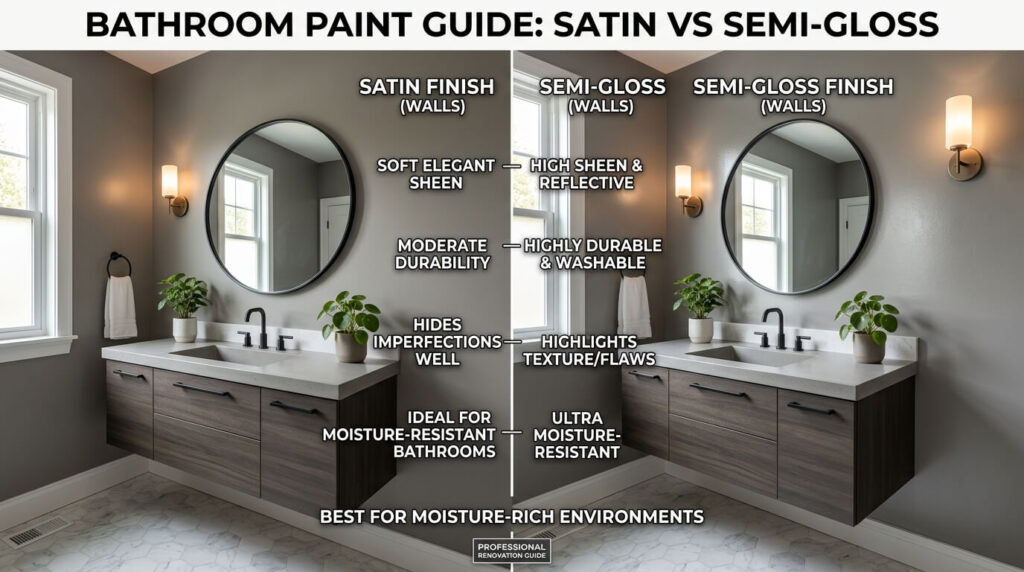
Satin Finish
Sheen level: 25–35%
Satin is the sweet spot for most bathrooms. It has a smooth, low-luster sheen that resists moisture, wipes clean easily, and still looks elegant without being overly reflective. Many experienced DIYers and interior designers default to satin for both kitchens and bathrooms.
Pros:
- Excellent moisture resistance
- Easy to clean with a damp cloth
- Attractive, understated finish
- Hides minor wall imperfections better than semi-gloss
- Works on walls, trim, and ceilings in lower-moisture baths
Cons:
- Shows brush strokes if applied carelessly
- Not as scrubbable as semi-gloss under harsh conditions
- Can highlight larger wall flaws
Best for: Main bathrooms with average to good ventilation, guest bathrooms, powder rooms. A versatile everyday choice.
Semi-Gloss Finish
Sheen level: 35–70%
Semi-gloss has been the traditional recommendation for bathroom walls for decades—and for good reason. Its tight, reflective film is highly resistant to moisture, withstands aggressive scrubbing, and makes mold growth much harder to establish.
Pros:
- Highly moisture and humidity resistant
- Extremely durable and scrubbable
- Reflects light, making small bathrooms feel brighter
- Resists staining from soap scum and cleaning products
- Industry-standard choice for bathroom walls and trim
Cons:
- Noticeably shiny—may feel clinical or stark
- Shows wall imperfections (dents, cracks, uneven texture) clearly
- Lap marks are more visible if painting technique is poor
Best for: Family bathrooms with heavy daily use, bathrooms with poor ventilation, kids’ bathrooms, any space with frequent scrubbing.
High-Gloss Finish
Sheen level: 70–90%+
High-gloss is the most durable finish available. It’s nearly impervious to moisture and chemical cleaning.
Pros:
- Maximum moisture resistance
- Easiest to clean of all finishes
- Hardest, most impact-resistant film
Cons:
- Very shiny—highlights every wall flaw, texture, and brush mark
- Rarely used on full walls; can feel overwhelming
- Requires flawless surface prep to look good
Best for: Trim, baseboards, door frames, vanity cabinets, and window casings in any bathroom. Rarely used on full walls except in sleek, modern designs by experienced painters.
Paint Finish Comparison Table
| Finish | Sheen Level | Moisture Resistance | Washability | Best Use in Bathroom |
|---|---|---|---|---|
| Flat/Matte | 0–5% | Poor | Poor | Avoid (powder rooms only with premium paint) |
| Eggshell | 10–25% | Low–Moderate | Moderate | Guest baths, powder rooms |
| Satin | 25–35% | Good | Good | Most bathrooms (best overall) |
| Semi-Gloss | 35–70% | Excellent | Excellent | Family baths, humid spaces, trim |
| High-Gloss | 70–90%+ | Maximum | Maximum | Trim, cabinets, doors |
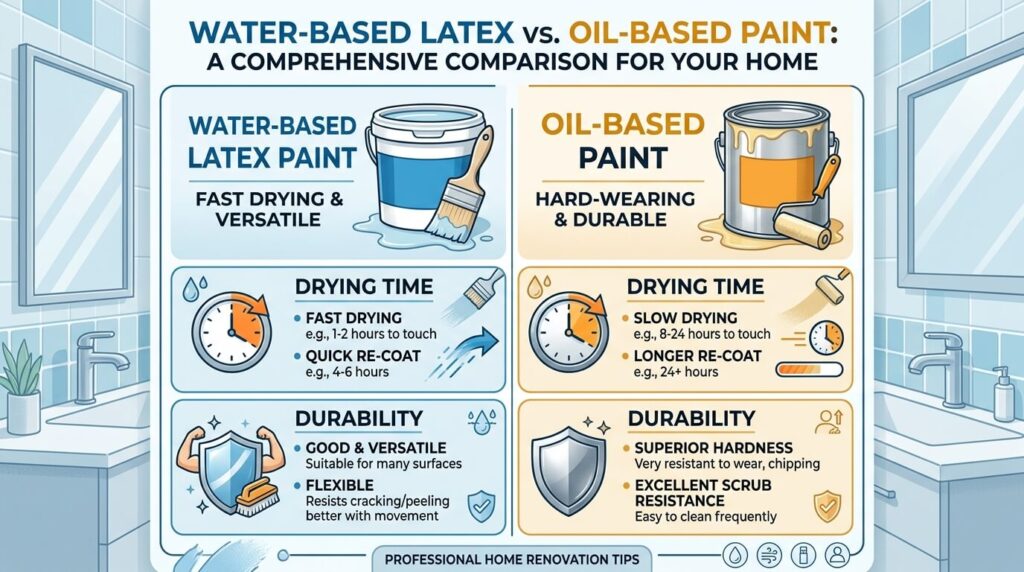
Best Paint Type for Bathroom Walls: Water-Based vs. Oil-Based
Water-Based (Latex) Paint
Water-based, or latex, paint has become the dominant choice for interior bathroom painting—and for good reason.
Advantages:
- Dries quickly (2–4 hours between coats)
- Low VOC (volatile organic compounds)—important in small, enclosed spaces
- Cleans up easily with soap and water
- Remains flexible as walls expand and contract with temperature changes, reducing cracking
- Wide range of mold-resistant formulas available
- Compatible with most primers
Disadvantages:
- Slightly less durable than oil-based (though modern formulas have closed the gap significantly)
Verdict: Water-based latex paint is the right choice for the overwhelming majority of bathroom painting projects.
Oil-Based Paint
Oil-based (alkyd) paint was once the gold standard for bathroom trim and high-moisture areas. It creates an incredibly hard, durable finish.
Advantages:
- Extremely hard and durable when fully cured
- Excellent stain resistance
- Superior adhesion on bare wood and metal
Disadvantages:
- Long drying time (8–24 hours between coats)
- Strong solvent fumes—requires excellent ventilation and respiratory protection
- Cleanup requires mineral spirits
- Yellows over time (especially problematic in white or light colors)
- Restricted or banned in some regions due to high VOC content
Where it still makes sense: Bathroom trim, especially on older homes with chalky or difficult surfaces, or on radiators. Most professionals now prefer high-quality water-based alkyd hybrids for trim—they offer oil-like hardness with latex convenience.
Water-Based Alkyd Hybrid Paint
This newer category bridges the gap between latex and oil-based. Brands like Benjamin Moore’s Advance and Sherwin-Williams Emerald Urethane Trim Enamel fall here.
Best for: Bathroom trim, vanity cabinets, and doors where you want oil-like durability without the downsides of traditional oil-based paint.
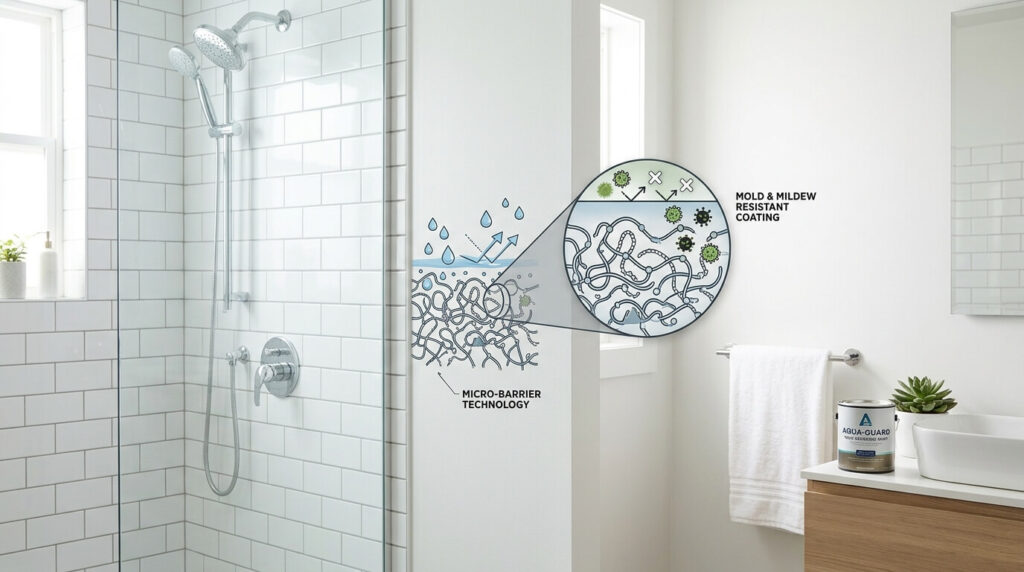
Mold-Resistant and Mildew-Resistant Paint for Bathrooms
Why Antimicrobial Paint Matters
Even with good ventilation and the right finish, bathrooms remain prone to mold and mildew. Antimicrobial paint additives—typically EPA-registered fungicides—work within the paint film to inhibit the growth of mold and mildew on the painted surface. This is different from simply sealing the surface against moisture penetration.
Look for paints specifically labeled:
- “Mold-resistant”
- “Mildew-resistant”
- “Antimicrobial formula”
- “Ideal for kitchens and bathrooms”
Important Caveat
Mold-resistant paint prevents mold from growing on the paint surface. It does not kill or remediate existing mold behind your walls. If you have an active mold problem, address the source (usually a moisture or ventilation issue) and remediate existing growth before painting.
Best Paint for Bathroom Ceilings
Bathroom ceilings are often the most neglected surface—and the most vulnerable. Steam naturally rises, making ceilings consistently the dampest surface in the room.
Key Requirements for Bathroom Ceiling Paint
- High moisture resistance: Look for formulas rated for high-humidity areas.
- Mold and mildew inhibitors: Essential, as ceilings collect condensation.
- Flat or low-sheen finish: Despite the moisture concern, flat or low-sheen ceiling paint is standard because ceilings don’t need to be scrubbed and a shiny ceiling looks odd.
- Flat ceiling paint labeled for bathrooms: Many brands offer “bathroom ceiling” formulas that are flat but moisture-resistant—the best of both worlds.
Pro Tip
Dedicated “ceiling white” paint is formulated to dry without lap marks and typically has a flat sheen. For bathrooms, opt for a ceiling white that explicitly mentions mold resistance or humidity suitability on the label.
Best Paint for Bathroom Trim, Doors & Cabinets
Trim and Baseboards
Semi-gloss or high-gloss finish is ideal for trim and baseboards. These surfaces need to endure scuffs, kicks, cleaning splashes, and general contact. Higher sheen = harder film = better durability.
Bathroom Doors
Semi-gloss or a water-based alkyd hybrid in semi-gloss works best. Doors see frequent touching and benefit from an easy-to-wipe surface.
Vanity Cabinets
If you’re painting bathroom cabinetry, use a dedicated cabinet-and-trim paint. Benjamin Moore Advance, Sherwin-Williams Emerald Urethane, or Rust-Oleum Cabinet Transformations are popular choices. These formulas self-level beautifully, cure to a hard finish, and resist chipping.
Finish recommendation for cabinets: Satin or semi-gloss. High-gloss can look stunning but shows every fingerprint and imperfection.
Best Primer for Bathrooms
Primer is often skipped by DIYers to save time—a mistake that significantly shortens how long your paint job lasts.
Why Primer Matters More in Bathrooms
- Seals porous drywall and old paint, preventing moisture absorption
- Provides a uniform base, so topcoat color appears true
- Helps topcoat adhere better and last longer
- Mold-resistant primers add an extra layer of protection before you even apply paint
Types of Bathroom Primer
PVA Drywall Primer: For new drywall or freshly patched surfaces. Seals the porous paper facing so paint doesn’t soak in unevenly.
Stain-Blocking Primer (shellac or oil-based): For covering water stains, smoke damage, or existing mold remediation spots. Shellac-based primers (like Zinsser BIN) are the most aggressive stain blockers.
Mold-Resistant Primer: Contains antimicrobial agents to inhibit mold growth in the primer layer itself. Zinsser Mold Killing Primer is a trusted option specifically for problem bathrooms.
All-in-One Primer/Paint: Convenient but rarely the best choice for true bathroom performance. Adequate for low-moisture spaces; use a separate dedicated primer for humid environments.
Pro Rule: Always Prime After Repairs
If you’ve patched holes, skim-coated, or sanded, always prime those areas before topcoating. Unpainted patches absorb paint differently, causing visible “flashing” (dull spots) in the finish.
Top Bathroom Paint Brands Compared
Sherwin-Williams
Bathroom Recommendation: Emerald Interior Acrylic Latex (satin or semi-gloss)
Widely considered the benchmark for premium interior paint. Emerald offers exceptional hide, easy application, low-odor formula, and outstanding mold/mildew resistance. The semi-gloss in Emerald is a top-tier bathroom choice.
Also consider: Duration Home Interior Latex (mid-tier, excellent durability).
Price range: $75–$95 per gallon
Benjamin Moore
Bathroom Recommendation: Aura Bath & Spa Matte Finish or Regal Select Semi-Gloss
Aura Bath & Spa is a unique product—it’s engineered with a waterborne formula specifically for high-humidity rooms and comes in a matte finish that actually holds up in bathrooms (one of the few matte formulas credibly rated for this use). Regal Select Semi-Gloss is a time-tested workhorse.
Price range: $70–$90 per gallon
Behr
Bathroom Recommendation: Behr Premium Plus Ultra (semi-gloss) or Behr Marquee (satin)
Available at Home Depot, Behr offers excellent value. Marquee is their premium line with one-coat coverage in many colors. The Premium Plus Ultra in semi-gloss performs reliably in humid bathrooms.
Price range: $40–$60 per gallon
Glidden
Bathroom Recommendation: Glidden Interior Paint + Primer (satin or semi-gloss)
Good budget option, especially for powder rooms and guest baths. Glidden argues that their premium flat formula is now washable enough for low-moisture bathrooms—technically true, but satin or semi-gloss remains the safer choice for most people.
Price range: $25–$45 per gallon
Zinsser (Rust-Oleum)
Bathroom Recommendation: Zinsser PermaWhite Mold & Mildew-Proof Interior Paint (semi-gloss or satin)
Purpose-built for bathrooms and high-moisture areas. PermaWhite is specifically marketed as mold and mildew proof for up to 5 years. An excellent choice, particularly for bathrooms with ventilation challenges.
Price range: $35–$55 per gallon
Brand Comparison Table
| Brand | Top Product | Price/Gallon | Sheen Options | Mold Resistance | Coverage |
|---|---|---|---|---|---|
| Sherwin-Williams | Emerald Interior | $75–$95 | Flat to Gloss | Excellent | ~400 sq ft |
| Benjamin Moore | Aura Bath & Spa | $70–$90 | Matte, Eggshell | Excellent | ~400 sq ft |
| Behr | Marquee | $40–$60 | Flat to Gloss | Good | ~400 sq ft |
| Zinsser | PermaWhite | $35–$55 | Satin, Semi-Gloss | Outstanding | ~350 sq ft |
| Glidden | Premium Plus | $25–$45 | Flat to Gloss | Good | ~350 sq ft |
How Much Paint Do You Need for a Bathroom?
Calculating Coverage
Most interior paint covers approximately 350–400 square feet per gallon. To estimate your bathroom’s wall area:
- Measure the perimeter of the room (add all wall widths together)
- Multiply by the ceiling height
- Subtract approximately 20 square feet per door and 15 square feet per window
- Divide by 350 (conservative estimate) for gallons needed
Example:
- 5′ x 8′ bathroom, 8′ ceiling
- Perimeter: (5+5+8+8) = 26 linear feet
- Wall area: 26 × 8 = 208 sq ft
- Minus one door (20 sq ft): 188 sq ft
- Gallons needed: 188 ÷ 350 ≈ 0.54 gallons → buy 1 quart for single coat, 1 gallon for two coats
Always buy slightly more than calculated. Having leftover paint for touch-ups is far more convenient than running short mid-project.
How to Choose the Right Color for Your Bathroom
Color Psychology in Bathroom Design
Color theory significantly shapes how we experience a space—and this matters especially in bathrooms, where the goal is often relaxation, refreshment, and a sense of cleanliness.
Cool Colors (Calming and Spacious)
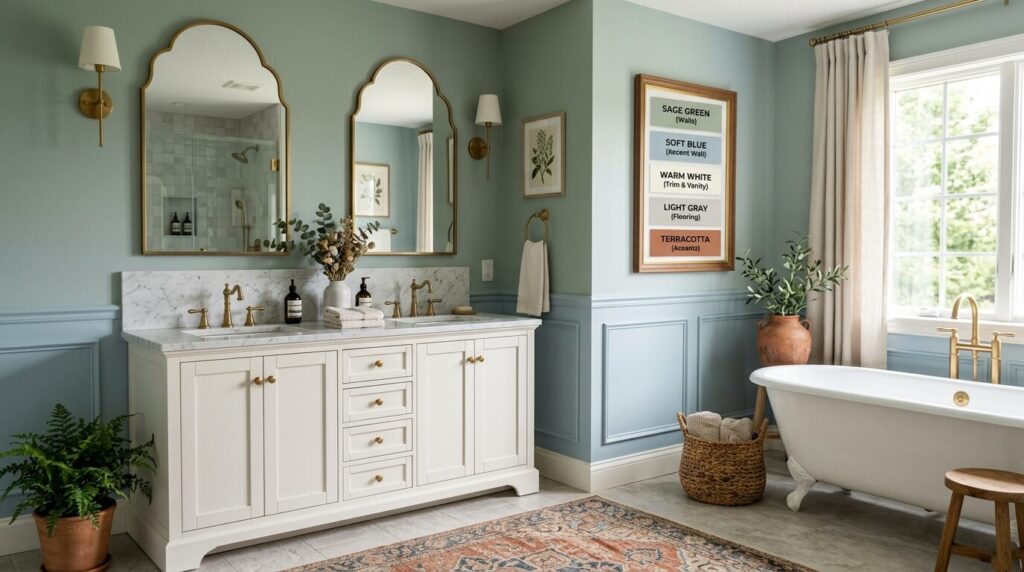
Blue: The quintessential bathroom color. From soft powder blue to deep navy, blue evokes calm, cleanliness, and openness. Research has linked cool blue tones to stress reduction and lower heart rate. Works in virtually any bathroom style—coastal, modern, traditional.
Green: Sage, seafoam, olive, and mint bring nature indoors. Green is associated with renewal and vitality, making it an excellent choice for spa-inspired bathrooms. Deep forest green creates moody drama; soft sage feels serene and organic.
Turquoise/Aqua: A hybrid of blue and green, turquoise evokes ocean getaways. Works beautifully with white tile and chrome or brushed gold fixtures.
Gray: A perennially popular neutral. Warm grays (with beige undertones) feel cozy; cool grays feel sleek and modern. Gray pairs well with white trim and both warm and cool accent colors.
Warm Colors (Cozy and Inviting)
Blush/Rose Pink: Soft pinks create warmth and a vintage-romantic feel. Not just for feminine spaces—dusty rose and terracotta-adjacent pinks are trending in contemporary interiors.
Warm White/Cream: A crisp, clean choice that makes tile, fixtures, and hardware pop. Off-whites (with yellow, peach, or gray undertones) feel warmer than stark whites.
Terracotta and Warm Ochre: An emerging trend—earthy, warm tones inspired by Mediterranean and desert aesthetics. Works surprisingly well with natural wood vanities and matte black hardware.
Neutrals and Timeless Choices
True White: Clean, fresh, and timeless. Reflect light to make small bathrooms feel larger. Pair with any accent color or hardware finish.
Greige (Gray + Beige): The most forgiving neutral—works with cool and warm tones, traditional and modern styles.
Color Tips for Small Bathrooms
- Light, cool colors (pale blue, soft gray, white) reflect light and make small spaces feel larger.
- A monochromatic palette (same color family on walls, trim, and towels) creates visual continuity.
- A bold accent wall (behind the vanity mirror or tub) adds personality without overwhelming a small space.
- High-sheen paint in a light color bounces light around, enhancing the sense of space.
Color Tips for Large Bathrooms
- Deeper, richer colors (navy, emerald, charcoal) are easier to pull off in larger spaces without feeling cave-like.
- Two-tone approaches—darker below a chair rail, lighter above—add architectural interest.
- Warm colors prevent large bathrooms from feeling cold or sterile.
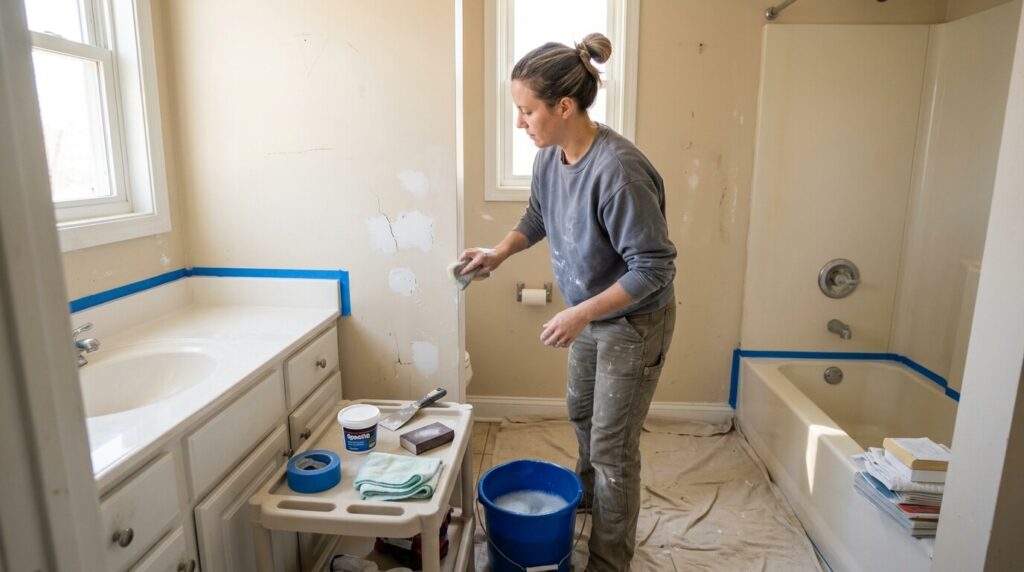
How to Prep Your Bathroom Before Painting
Preparation accounts for roughly 70% of a professional-quality paint job. Skipping steps here leads to peeling, uneven color, and premature failure.
Step 1: Clear and Protect the Space
- Remove everything from the bathroom: rugs, towels, art, accessories.
- Take down toilet paper holders, towel bars, and switch plates.
- Cover the toilet, vanity, and floor with drop cloths or painter’s plastic.
- Apply painter’s tape along the edges of fixtures, around the tub, and at ceiling lines.
Step 2: Clean the Walls Thoroughly
Bathroom walls accumulate soap residue, moisture deposits, and grime that prevent paint adhesion. Clean all surfaces with a solution of trisodium phosphate (TSP) or a TSP substitute mixed in warm water. Rinse with clean water and allow walls to dry completely—at least 24 hours.
For existing mold or mildew spots: treat with a diluted bleach solution (1 part bleach : 3 parts water), scrub, rinse, and allow to fully dry before proceeding.
Step 3: Repair Damaged Surfaces
Inspect all walls and ceilings for:
- Cracks or hairline fractures → fill with lightweight spackle or joint compound
- Nail holes → fill with spackle
- Loose or peeling paint → scrape away, feather the edges, spackle
- Water-damaged areas → identify and fix the moisture source first; then sand, spackle, and prime with a stain-blocking primer
Sand repaired areas smooth once dry (120-grit sandpaper), then wipe down with a damp cloth to remove dust.
Step 4: Apply Primer
Always prime:
- New drywall (mandatory)
- Repaired or patched areas
- If changing from a very dark to a very light color (or vice versa)
- In bathrooms with any history of moisture problems or mold
Allow primer to dry per manufacturer instructions (usually 1–2 hours for latex primers) before topcoating.
Step 5: Ventilate
Open windows if possible, use a bathroom fan, and consider bringing in a box fan. Good airflow during and after painting speeds drying, reduces fume buildup, and leads to a better finish.
How to Paint a Bathroom: Step-by-Step Process
Tools You’ll Need
- Paint roller (9″ for walls, 4″ mini roller for tight spaces)
- Paint roller covers (3/8″ nap for smooth walls, ½” for textured walls)
- 2″ angled brush for cutting in
- Paint tray and liner
- Painter’s tape
- Drop cloths
- Mixing stick
- Extension pole for ceilings
- Damp cloth for drips
Step 1: Cut In First
Using your angled brush, paint a 2–3 inch border along:
- The ceiling line
- Around fixtures and switches
- Corners where walls meet
- Above baseboards
Cutting in before rolling prevents visible brush marks in the rolled areas.
Step 2: Roll the Walls
Load your roller evenly with paint and apply in a “W” or “M” pattern before filling in. Work in 3×3 foot sections. Maintain a wet edge—always roll into wet paint to avoid lap marks (especially important with semi-gloss and high-gloss finishes).
Step 3: First Coat on Ceiling
Use a flat or low-sheen ceiling paint. Roll in parallel stripes across the narrower dimension of the ceiling. Allow to fully dry.
Step 4: Apply Second Coat
For most bathroom paints, two coats are necessary for full opacity and moisture protection. Apply the second coat perpendicular to the first for even coverage. Allow to dry completely before removing painter’s tape.
Step 5: Trim and Detail Work
Paint trim, baseboards, and door frames last (or after walls are fully dry). Use a quality angled brush or mini roller for a smooth, drip-free finish.
Drying vs. Curing Time
Drying time: How long before it’s dry to touch (usually 1–4 hours for latex).
Cure time: How long before the paint reaches full hardness and durability (typically 2–4 weeks for latex).
During the cure period, clean walls gently with a damp cloth only—aggressive scrubbing before the paint is fully cured can damage the surface.
Common Bathroom Painting Mistakes to Avoid
Skipping the Primer
The number one DIY mistake. Especially in bathrooms, primer is not optional—it seals the surface, helps paint adhere, and provides a critical layer of mold resistance.
Choosing Flat Paint
Flat paint absorbs moisture, is nearly impossible to clean without damaging, and creates the ideal environment for mold. Unless you’re using a specialty bathroom-rated premium flat in a powder room, always choose at least eggshell.
Painting Over Existing Mold
This will never work long-term. Paint over mold and the mold will grow through the new coat within months. Remediate first.
Not Cleaning Walls First
Soap residue, body oils, and bathroom grime are invisible but will prevent paint from adhering properly. The result is peeling and bubbling—usually within a year.
Inadequate Drying Time Between Coats
Impatience leads to lifting paint. Follow the manufacturer’s recoat window (usually minimum 2–4 hours for latex paints, longer in high humidity).
Forgetting the Ceiling and Trim
Many DIYers only paint the walls. But ceiling and trim see just as much moisture and need an appropriate finish too.
Using Leftover Living Room Paint
It might save money in the short term, but standard interior paint—even quality paint—isn’t rated for high-humidity environments. You’ll be repainting within a year.
Ventilation and Its Impact on Paint Performance
This is a section that virtually every competitor article misses entirely—but it’s crucial.
The Role of Bathroom Ventilation
Paint performance in a bathroom is directly tied to how quickly moisture dissipates. Even the best semi-gloss paint will eventually fail in a bathroom with no exhaust fan and no window if steam is allowed to linger for hours after every shower.
Best practices:
- Run the exhaust fan during and 20–30 minutes after every shower. This removes steam before it condenses on walls.
- Upgrade your exhaust fan if needed. The fan should be rated for your bathroom’s square footage (look for CFM ratings—cubic feet per minute).
- Open a window after showering when possible.
With good ventilation, even eggshell paint can perform acceptably. Without it, even semi-gloss can fail prematurely.
Paint for Bathroom: Room-by-Room Recommendations
Master Bathroom / Full Bathroom
Walls: Satin or semi-gloss in a mold-resistant formula
Ceiling: Mold-resistant flat ceiling paint
Trim: Semi-gloss or high-gloss
Cabinets: Satin or semi-gloss cabinet-and-trim paint
Master baths typically see heavy daily use by multiple people. Prioritize durability and mold resistance.
Guest Bathroom / Secondary Bathroom
Walls: Satin (slightly more relaxed requirements than a primary bath)
Ceiling: Mold-resistant flat
Trim: Semi-gloss
Guest baths see intermittent use. Satin is perfectly adequate.
Powder Room / Half Bath
Walls: Eggshell, satin, or even a premium flat
Ceiling: Standard flat ceiling paint or low-sheen
Trim: Semi-gloss
Powder rooms have no shower or tub—dramatically lower humidity. You have more flexibility here, including the ability to use matte/flat finishes or bold, dramatic colors that might overwhelm a larger bathroom.
Basement Bathroom
Walls: Semi-gloss or high-gloss with high mold resistance
Ceiling: Mold-resistant, moisture-resistant ceiling paint
Trim: High-gloss
Basement bathrooms often have the poorest ventilation and highest ambient moisture. Use the most moisture-resistant options available, and consider a dehumidifier as a supplementary measure.
How Long Does Bathroom Paint Last?
With proper preparation and the right products, a bathroom paint job should last:
- Walls (satin/semi-gloss): 3–7 years before needing a full repaint
- Ceilings: 3–5 years (more condensation exposure)
- Trim: 5–10 years (less humidity exposure, hard finish)
Factors that shorten paint life:
- Poor ventilation
- Inadequate surface prep
- Skipping primer
- Using a finish that’s too low-sheen for the humidity level
- Harsh cleaning products applied too aggressively
Cost of Painting a Bathroom
DIY Costs
| Item | Estimated Cost |
|---|---|
| Paint (1–2 quarts for small bath) | $15–$50 |
| Primer | $15–$30 |
| Brushes and roller | $15–$30 |
| Painter’s tape | $5–$10 |
| Drop cloths | $5–$20 |
| Sandpaper, spackle | $10–$20 |
| Total DIY | $65–$160 |
Professional Painting Costs
A professional painter typically charges:
- Labor: $200–$600 for a standard bathroom (varies by region and complexity)
- Materials: $50–$150 (paint, primer, supplies)
- Total professional: $250–$800+
Factors affecting pro cost: bathroom size, condition of existing surfaces, number of colors, trim work, and local labor rates.
Is It Worth Hiring a Professional?
For straightforward repaints with no major surface repairs: DIY is very manageable. If walls have significant damage, there’s existing mold that needs remediation, or you want a flawless semi-gloss finish (which shows every imperfection and brush mark), a professional brings real value.
FAQ: Paint for Bathroom
1. What is the best type of paint to use in a bathroom?
A water-based latex paint in a satin or semi-gloss finish, with mold and mildew resistance, is the best choice for most bathrooms. For ceilings, use a flat ceiling paint specifically rated for high-moisture areas.
2. Is semi-gloss or satin better for bathroom walls?
Both are good choices. Semi-gloss is more moisture-resistant and durable—ideal for high-humidity, high-traffic bathrooms or those with poor ventilation. Satin offers a more attractive, subtle finish and is perfectly adequate for most standard bathrooms.
3. Can I use regular interior paint in the bathroom?
You can, but standard interior paint will underperform in a humid bathroom. It’s more likely to peel, grow mildew, and stain. Always choose paint rated for high-moisture or bathroom use.
4. Do I need special primer for bathroom walls?
At minimum, use a water-based primer before painting. For bathrooms with past mold issues or poor ventilation, use a mold-resistant primer like Zinsser Mold Killing Primer for the best protection.
5. Can I use flat paint in a bathroom?
Standard flat paint is not recommended for most bathrooms. Premium flat formulas may work in well-ventilated powder rooms but satin or semi-gloss is always the safer choice.
6. How many coats of paint does a bathroom need?
Two coats are standard for full coverage and moisture protection. A primer coat plus two topcoats is ideal for a fresh bathroom paint job.
7. What color paint makes a small bathroom look bigger?
Light, cool colors—soft white, pale blue, light gray—reflect light and visually expand small spaces. Painting trim and walls in the same or similar color also reduces visual fragmentation, making the room feel more spacious.
8. How long should I wait between coats of bathroom paint?
Follow the manufacturer’s recommendation—typically 2–4 hours for latex paint. In high humidity (like a bathroom that’s been recently used), add extra drying time. Never rush recoating.
9. What paint finish is best for bathroom trim?
Semi-gloss or high-gloss is ideal for trim, baseboards, and door frames. These high-durability finishes withstand cleaning, moisture, and everyday contact better than lower-sheen options.
10. What is the best paint for a bathroom ceiling?
Use a flat or low-sheen ceiling paint specifically labeled as mold-resistant or suitable for high-humidity areas. Sherwin-Williams Ceiling Paint (flat) and Zinsser PermaWhite are reliable choices.
11. Should I use oil-based or water-based paint in the bathroom?
Water-based latex paint is recommended for most bathroom applications. It dries faster, has lower VOC, and modern formulas are highly durable. Oil-based paint can be used for trim but has significant downsides (long dry time, fumes, yellowing).
12. How do I prevent mold on bathroom walls after painting?
Use a mold-resistant primer and topcoat, run the exhaust fan during and after showers, fix any leaks promptly, and ensure adequate ventilation. Even the best paint cannot compensate for chronically poor ventilation.
13. Can I paint over bathroom tiles?
Yes, with the right preparation and specialized tile or bonding primer. Tile-specific paint kits (such as Rust-Oleum Tub & Tile Refinishing Kit) are available, but the result is not permanent—expect to recoat every few years.
14. What is the best paint for a bathroom vanity cabinet?
A water-based alkyd hybrid like Benjamin Moore Advance or Sherwin-Williams Emerald Urethane Trim Enamel in satin or semi-gloss provides the best results: hard, smooth, washable finish that resists chipping and yellowing.
15. How much does it cost to paint a bathroom?
DIY bathroom painting typically costs $65–$160 in materials. Hiring a professional ranges from $250–$800+ depending on bathroom size, surface condition, and local labor rates.